How To Stencil
Step by Step Guide:
* It is a good idea to practice stenciling on scrap paper or cardboard before beginning your project. |
||
Get Started:These simple steps apply to stenciling virtually any surface from a tote bag to a wall. |
||
|
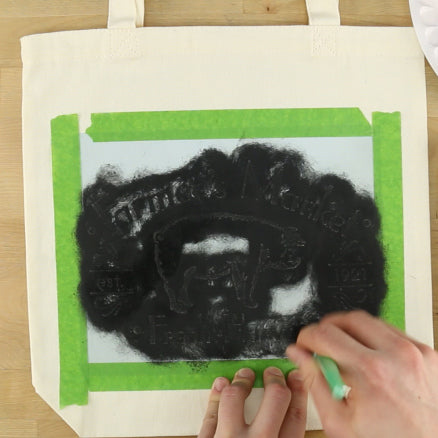
1. Make sure surface to be stenciled is clean. 2. Spray back of stencil with Repositionable Adhesive Spray by holding can about 10 inches away and in a sweeping motion, lightly spray the stencil. Wait 30-60 seconds for stencil to "dry" so that it is slightly sticky. 3. Carefully position stencil over the surface you are going to stencil and press all the design details onto the surface. 4. Once in place, put painter’s tape around the stencil’s edges.
|
Your Supplies:
|
|
Prepare Your Paint: |
||
|
1. Pour paint on a paper plate. 2. Dip brush in paint, swirling on the plate to remove excess. 3. Less paint is better for stenciling. If you have too much paint, it will bleed under the stencil, creating a blurry design. Blot excess paint on a roll of paper towels or old newspaper. Your brush should be almost dry to the touch. 4. To see if you still have too much paint, dot the brush on a piece of scrap paper, then swipe the dot with your finger. If the paint dot smudges, you have too much paint on the brush, so keep blotting on the paper towel until you have a virtually dry brush.
|
||
Stencil: |
||
|
1. Hold stencil lightly in place with one hand. 2. Begin stenciling from outer edges moving inwards in circular motions. 3. Apply several light coats of paint. (4-5 coats is normal). |
||
Finishing: |
||
|
1. Lift stencil corner and check color before removing stencil. 2. Gently peel off stencil and allow paint to dry fully. |
||
Clean Up: |
||
|
||
Take a Picture and share it with Oak Lane Studio for our Gallery!
|
||
|
|
||