How to Stencil a Multicolor Hopscotch Game
Posted by JIM RANDOLPH

Hopscotch is a classic playground game and a staple of recess activities. In this tutorial, we will show how to stencil a multicolored hopscotch game. The benefit of stenciling a hopscotch court, instead of just drawing a chalk outline, is that the hopscotch court will not wash away when it rains, so you can play hopscotch all year round!
Our hopscotch stencil is easy to use, reusable, and perfect for stenciling in a school playground, community center or driveway.
In this guide we will demonstrate how to stencil with a paint roller, paint brush and spray paint in multiple colors. For more tips on stenciling with spray paint, see our spray paint and spray box tutorial.
Scroll down to watch our how to stencil a hopscotch court video tutorial.
Hopscotch is a fun Active Play game
Active play is an essential part of childhood development and learning, and also buckets of FUN! Outdoor, active play has been shown to nurture children's physical development, including balance and hand-eye coordination, and physical literacy.
Physical literacy the confidence children develop in their physical abilities as they engage in active play, and the motivation to be physically active. Physical literacy helps children build and maintain an active lifestyle as they grow up and is critical to preventing childhood obesity.
Active play also has numerous health benefits, including improving emotional wellbeing and supporting a healthy immune system, improving cognitive abilities and reducing stress. More importantly, physical activity makes people happier; we laugh more, smile more, and have a more positive mindset when we engage in active play.
How to Play Hopscotch
Hopscotch is one of the most popular playground games and a great way to engage in active play. In addition to the traditional hopscotch game, there are many other creative variations of hopscotch you can play to add some excitement to this classic recess game. For beginners, here is a guide for how to play hopscotch, and fun hopscotch variations to mix up your playground games.
Hopscotch isn't just for kids, adults can enjoy a game of hopscotch too!
Feel free to come up with your own creative hopscotch game!
How to Stencil a Hopscotch Court Guide:
What do I need to Stencil? |
|
How to Stencil Hopscotch Instructions:
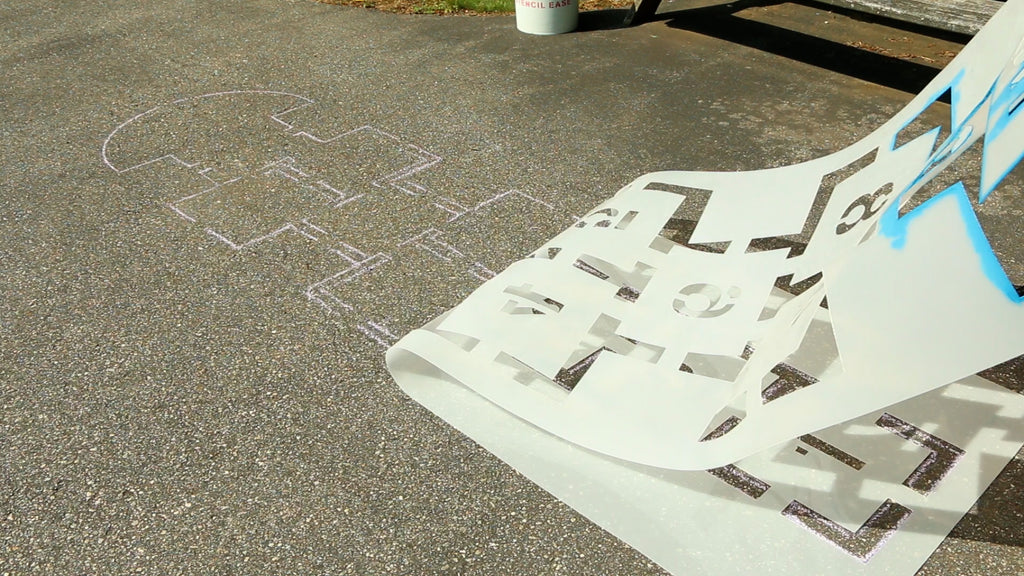
Step 1: Draw the Hopscotch Court Outline
Lay the stencil on the ground where you want the hopscotch court to be.Trace the stencil outline with chalk and then remove the stencil.
You can use painters tape to cover the lines between the hopscotch boxes ensure crisp lines between the two background colors.
You will paint the background within these chalk markings, and then replace the stencil to paint the borders of the hopscotch boxes (in our hopscotch example these are the white lines). Try to paint the background within the chalk outline, but do not worry if some paint crosses the lines. Any messy edges will be stenciled over later.

Step 2: Paint the Base Coat
We recommend painting a base coat for several reasons:
- A base coat smooths the pavement, which will help to create a even surface for stenciling. This is important for preventing paint from seeping underneath the stencil and smudging the hopscotch court lines. (This is called paint bleed).
- If you get any bleed while stenciling you can repair easily by touch up painting the bleed areas with the base coat.
- It makes the hopscotch court more colorful, fun and inviting!
You may use a roller, brush, or spray paint and spray box (explained here) to paint the background colors of each of these boxes. Paint two thick coats of paint where the colored boxes will be. As long as you paint close to the chalk lines, the hopscotch outline will cover up any of the overlap.
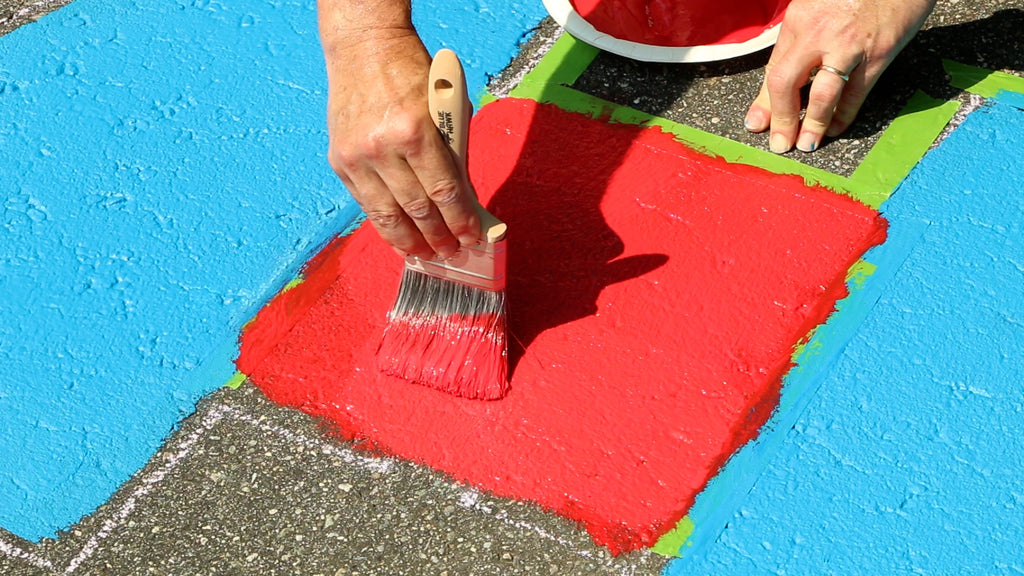
Next, we alternate colors using red exterior pavement paint and a brush. Don’t worry about how much paint you are using on the brush in these sections as we are not stenciling yet. Just be careful not to get any paint outside of the chalk lines you drew for yourself. Paint these boxes with two coats of red paint before moving on.
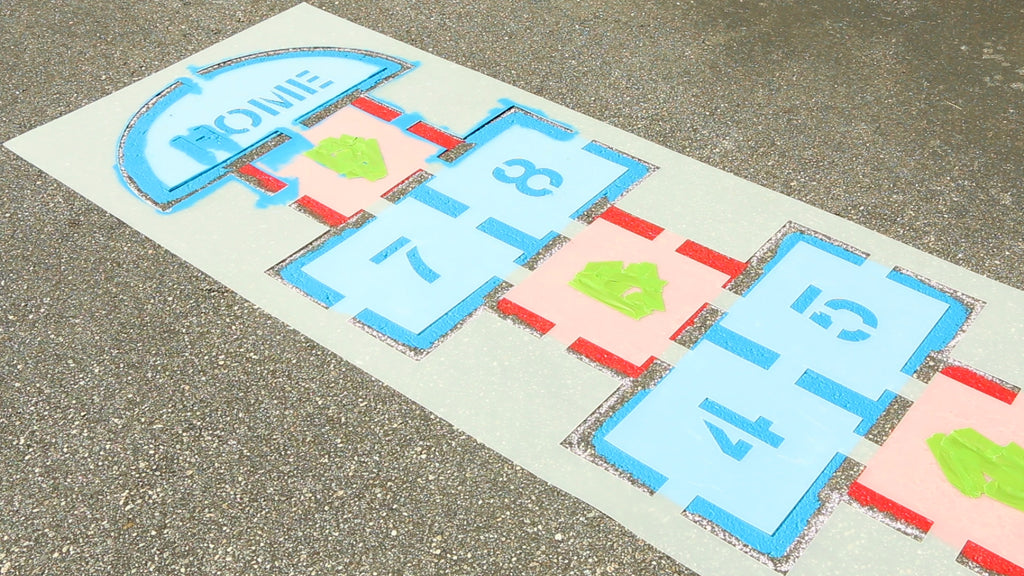
Step 4: Prepare to Stencil the hopscotch court
Remove the Frog Tape painters’ tape and let the paint dry.
Once the paint has dried fully place the hopscotch stencil over the painted background. The lines of the hopscotch stencil should overlap slightly the colors of the background. When painted white, these lines will outline the blue and red sections and turn the background colors into perfect boxes.
Before you start stenciling the lines and numbers white, be sure to tape off any numbers you will be stenciling in a different color. In our example, we covered the numbers in the red boxes (numbers 1, 3, 6 and 9) with green frog tape. These numbers will be stenciled in a second color.
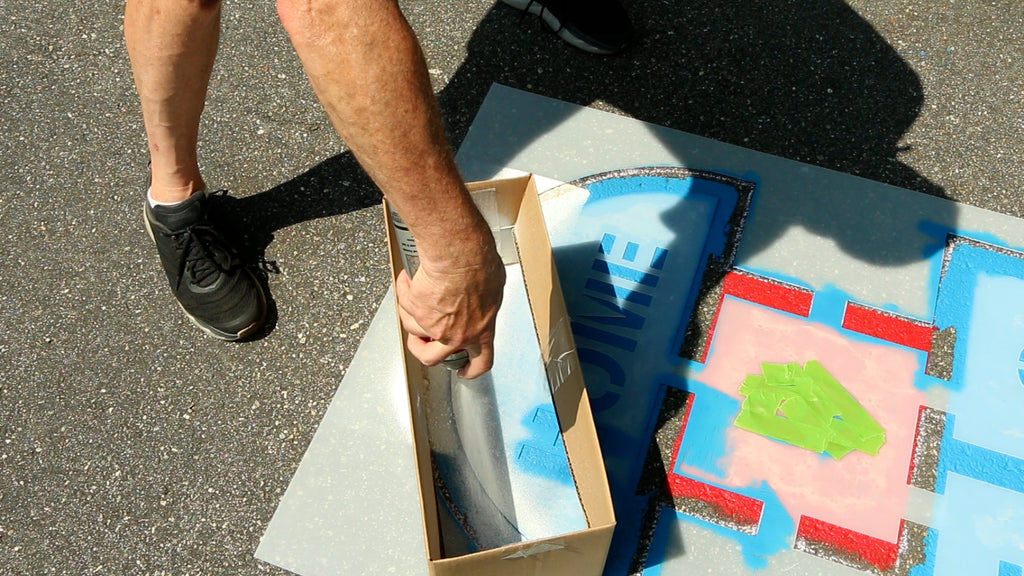
How to Stencil with Spray Paint
The key to stenciling with spray paint is to USE A SPRAY BOX. A spray box is a small, open ended cardboard box which reates a shallow tunnel to spray through. The spray box will prevent wind from blowing paint all over the hopscotch court and ensure that paint is only applied exactly where you want it. To stencil with spray paint, place the spray box over the section of stencil you will spray paint, and spray the stencil from within the box.
Stenciling with Spray Paint Tips:
- Hold the tip of the spray paint nozzle just below the top of the box, about 8 inches above the stencil, as you spray the paint through.
- Spray perpendicular to the pavement.
- Always spray in thin coats of paint, and continually move the spray paint up and down the stencil. Do not fill in one spot at a time because this will cause paint to bleed under the stencil.
- Stencil in multiple, light coats of spray paint. (Normally 4 coats of paint).
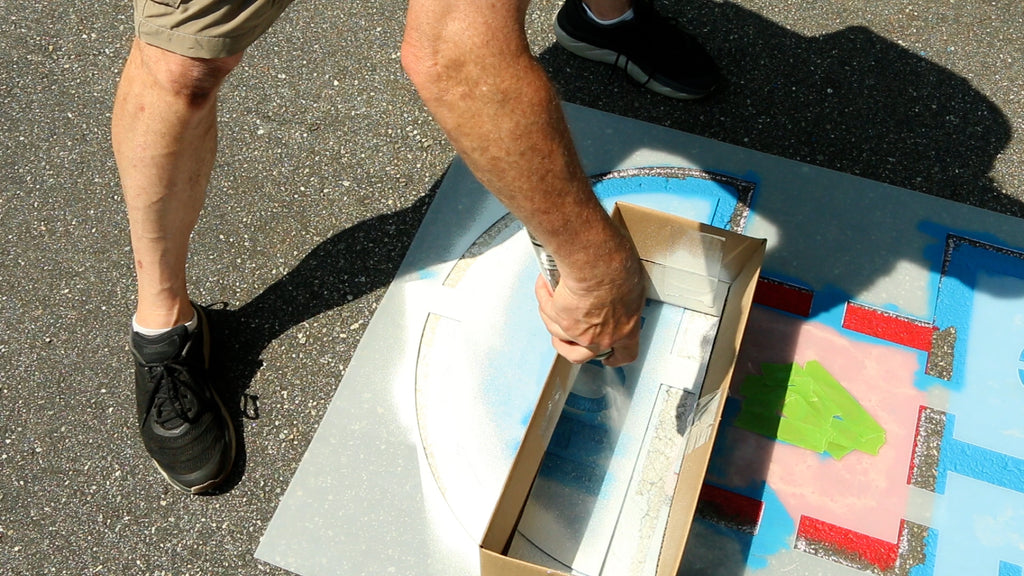
Be sure to overlap where you place the spray box as you paint for total coverage of the lines.
How to Make a Spray Box: |
|
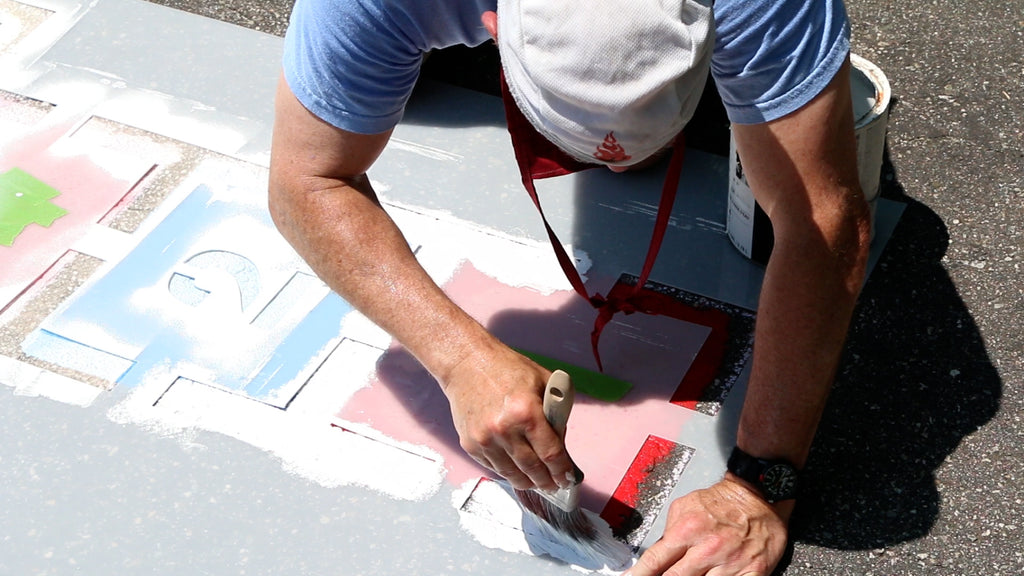
How to Stencil with a Paint Brush
You can use a paint brush to stencil on pavement, but it requires patience and we normally do not recommend it. The reason to use a paint or stencil brush when stenciling on pavement is to paint multiple color accents. With the hopscotch court stencil we stenciled the hopscotch numbers with a paint brush.
The technique to stenciling asphalt with a brush is very similar to painting trim:
-
Carefully control the amount of paint on the brush. If too much paint is applied at once on the rough surface of pavement, the paint will flow sideways and potentially under the stencil, outside where you want the paint to go. Blot excess paint off the brush before stenciling.
-
Use the edge of the stencil as a guide when stenciling.
- Stencil in multiple, light coats of paint.
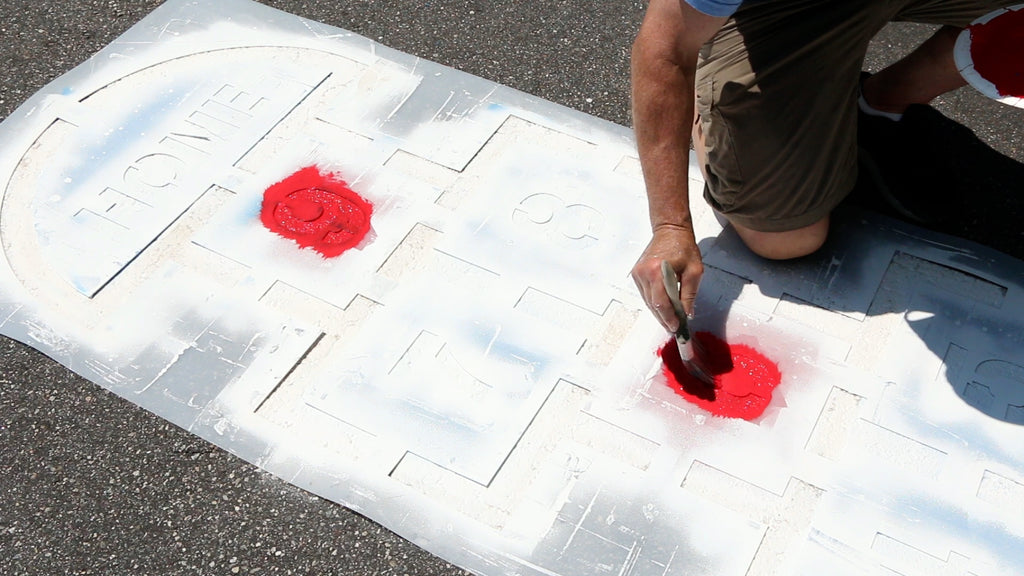
With the first numbers stenciled you are ready to paint the others in a second color. Here is a trick to do that while cutting down on paint bleed. Start by painting the base color of the block through the numbers. This will create a seal between the stencil and the pavement that will prevent the next color of paint from bleeding through. Then let this base coat dry to the touch.
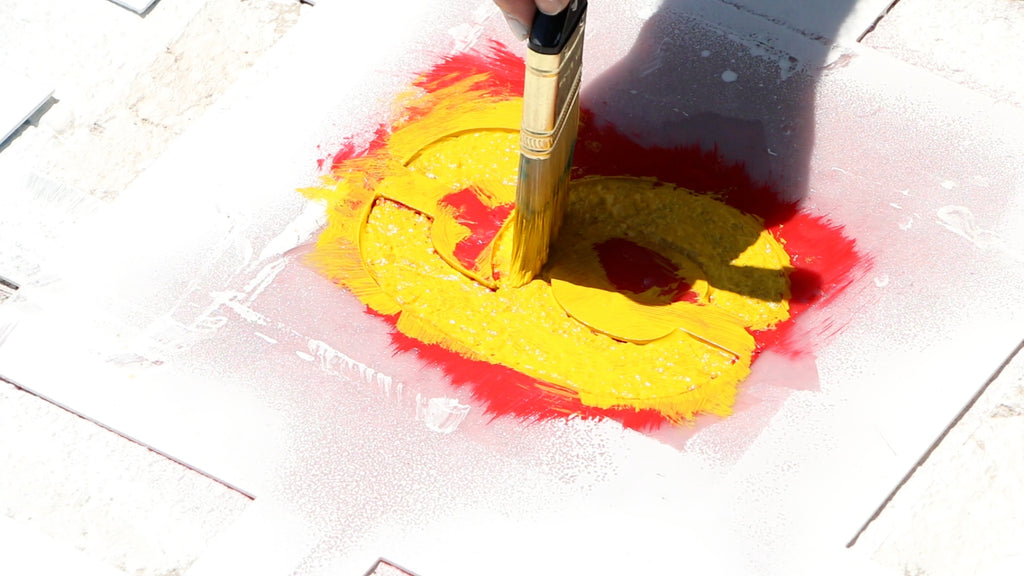
Once the base coat is dry you can paint the second color of paint through the top. Since the base coat is locking in the paint to the stencil boundaries you don’t need to be quite as careful about paint bleed as you stencil the yellow. That being said, your brush should still not be dripping with paint as you stencil the second set of numbers in about 2 coats. Once you paint all the numbers you are ready to lift the stencil straight off of your surface!
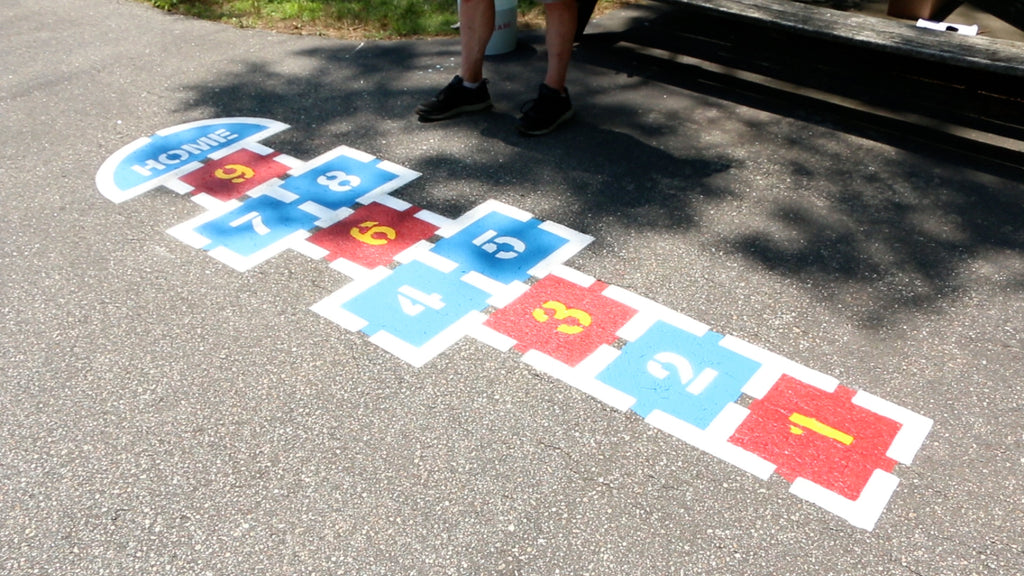
Step 5: Fill in the stencil gaps
With the stencil removed, you may notice that the lines of the stencil are not continuous due to the breaks in the stencil. These breaks provide structural integrity to the stencil to keep it as one solid piece of plastic. Some people like the style of these breaks, but here’s a quick way to fill them in.
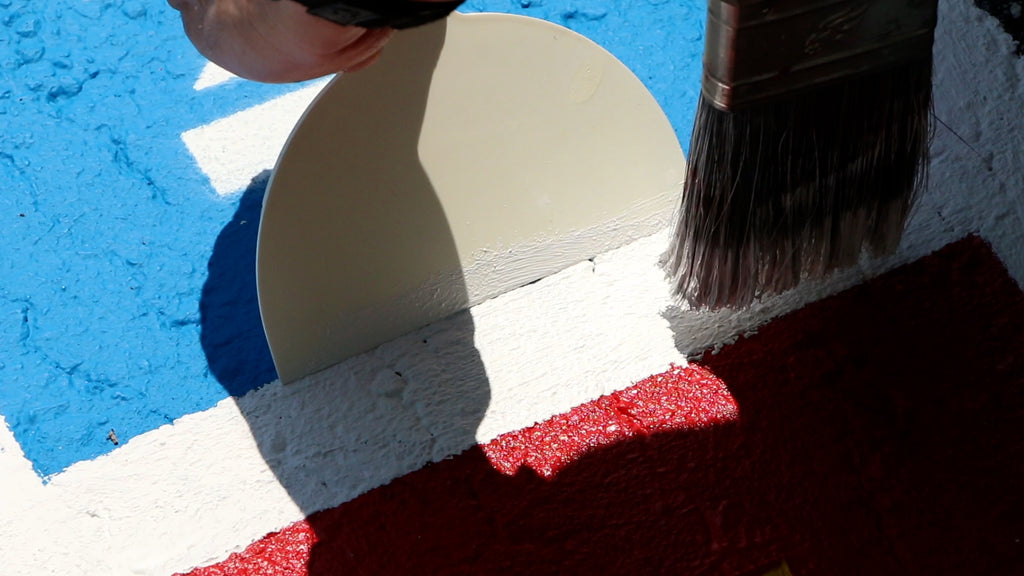
Use a putty knife as a straightedge on both sides of the line along with a paint brush. This way you can connect each break of the stencil design to achieves the solid lines as seen in this tutorial!
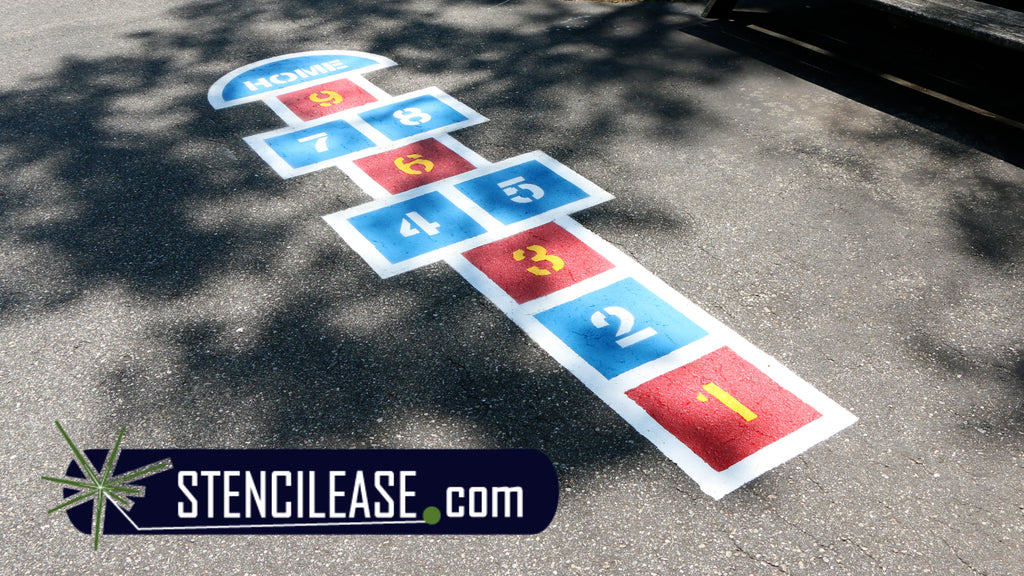
Your finished, multi-color hopscotch should look something like this. Use your imagination though, as there are endless color combinations you can make using a hopscotch stencil from Stencilease.com and your imagination. For more information, check out the video below!
